Airflow in ECS with Redis - Part 3: docker compose

I'm Mariano, I am from 🇦🇷 and live in 🇳🇱. I am a Cloud Engineer 9-5 and many other things 5-9.
Previously in Deploying Airflow in ECS using S3 as DAG storage via Terraform, I described how to deploy all components in AWS ECS using a hybrid EC2/Fargate launch type and S3 as DAG storage.
Now let's do the same, but with three main differences:

Using
docker composeintegration with AWS ECS, which uses AWS CloudFormation behind curtains, instead of doing it via Terraform.- Fewer hybrid tools, you just need Docker Desktop installed locally.
All components running on Fargate ECS launch type.
AWS EFS as DAG storage instead of S3.
- No need to worry about S3 mount drivers,
docker composenatively integrates with AWS EFS.
- No need to worry about S3 mount drivers,
Components
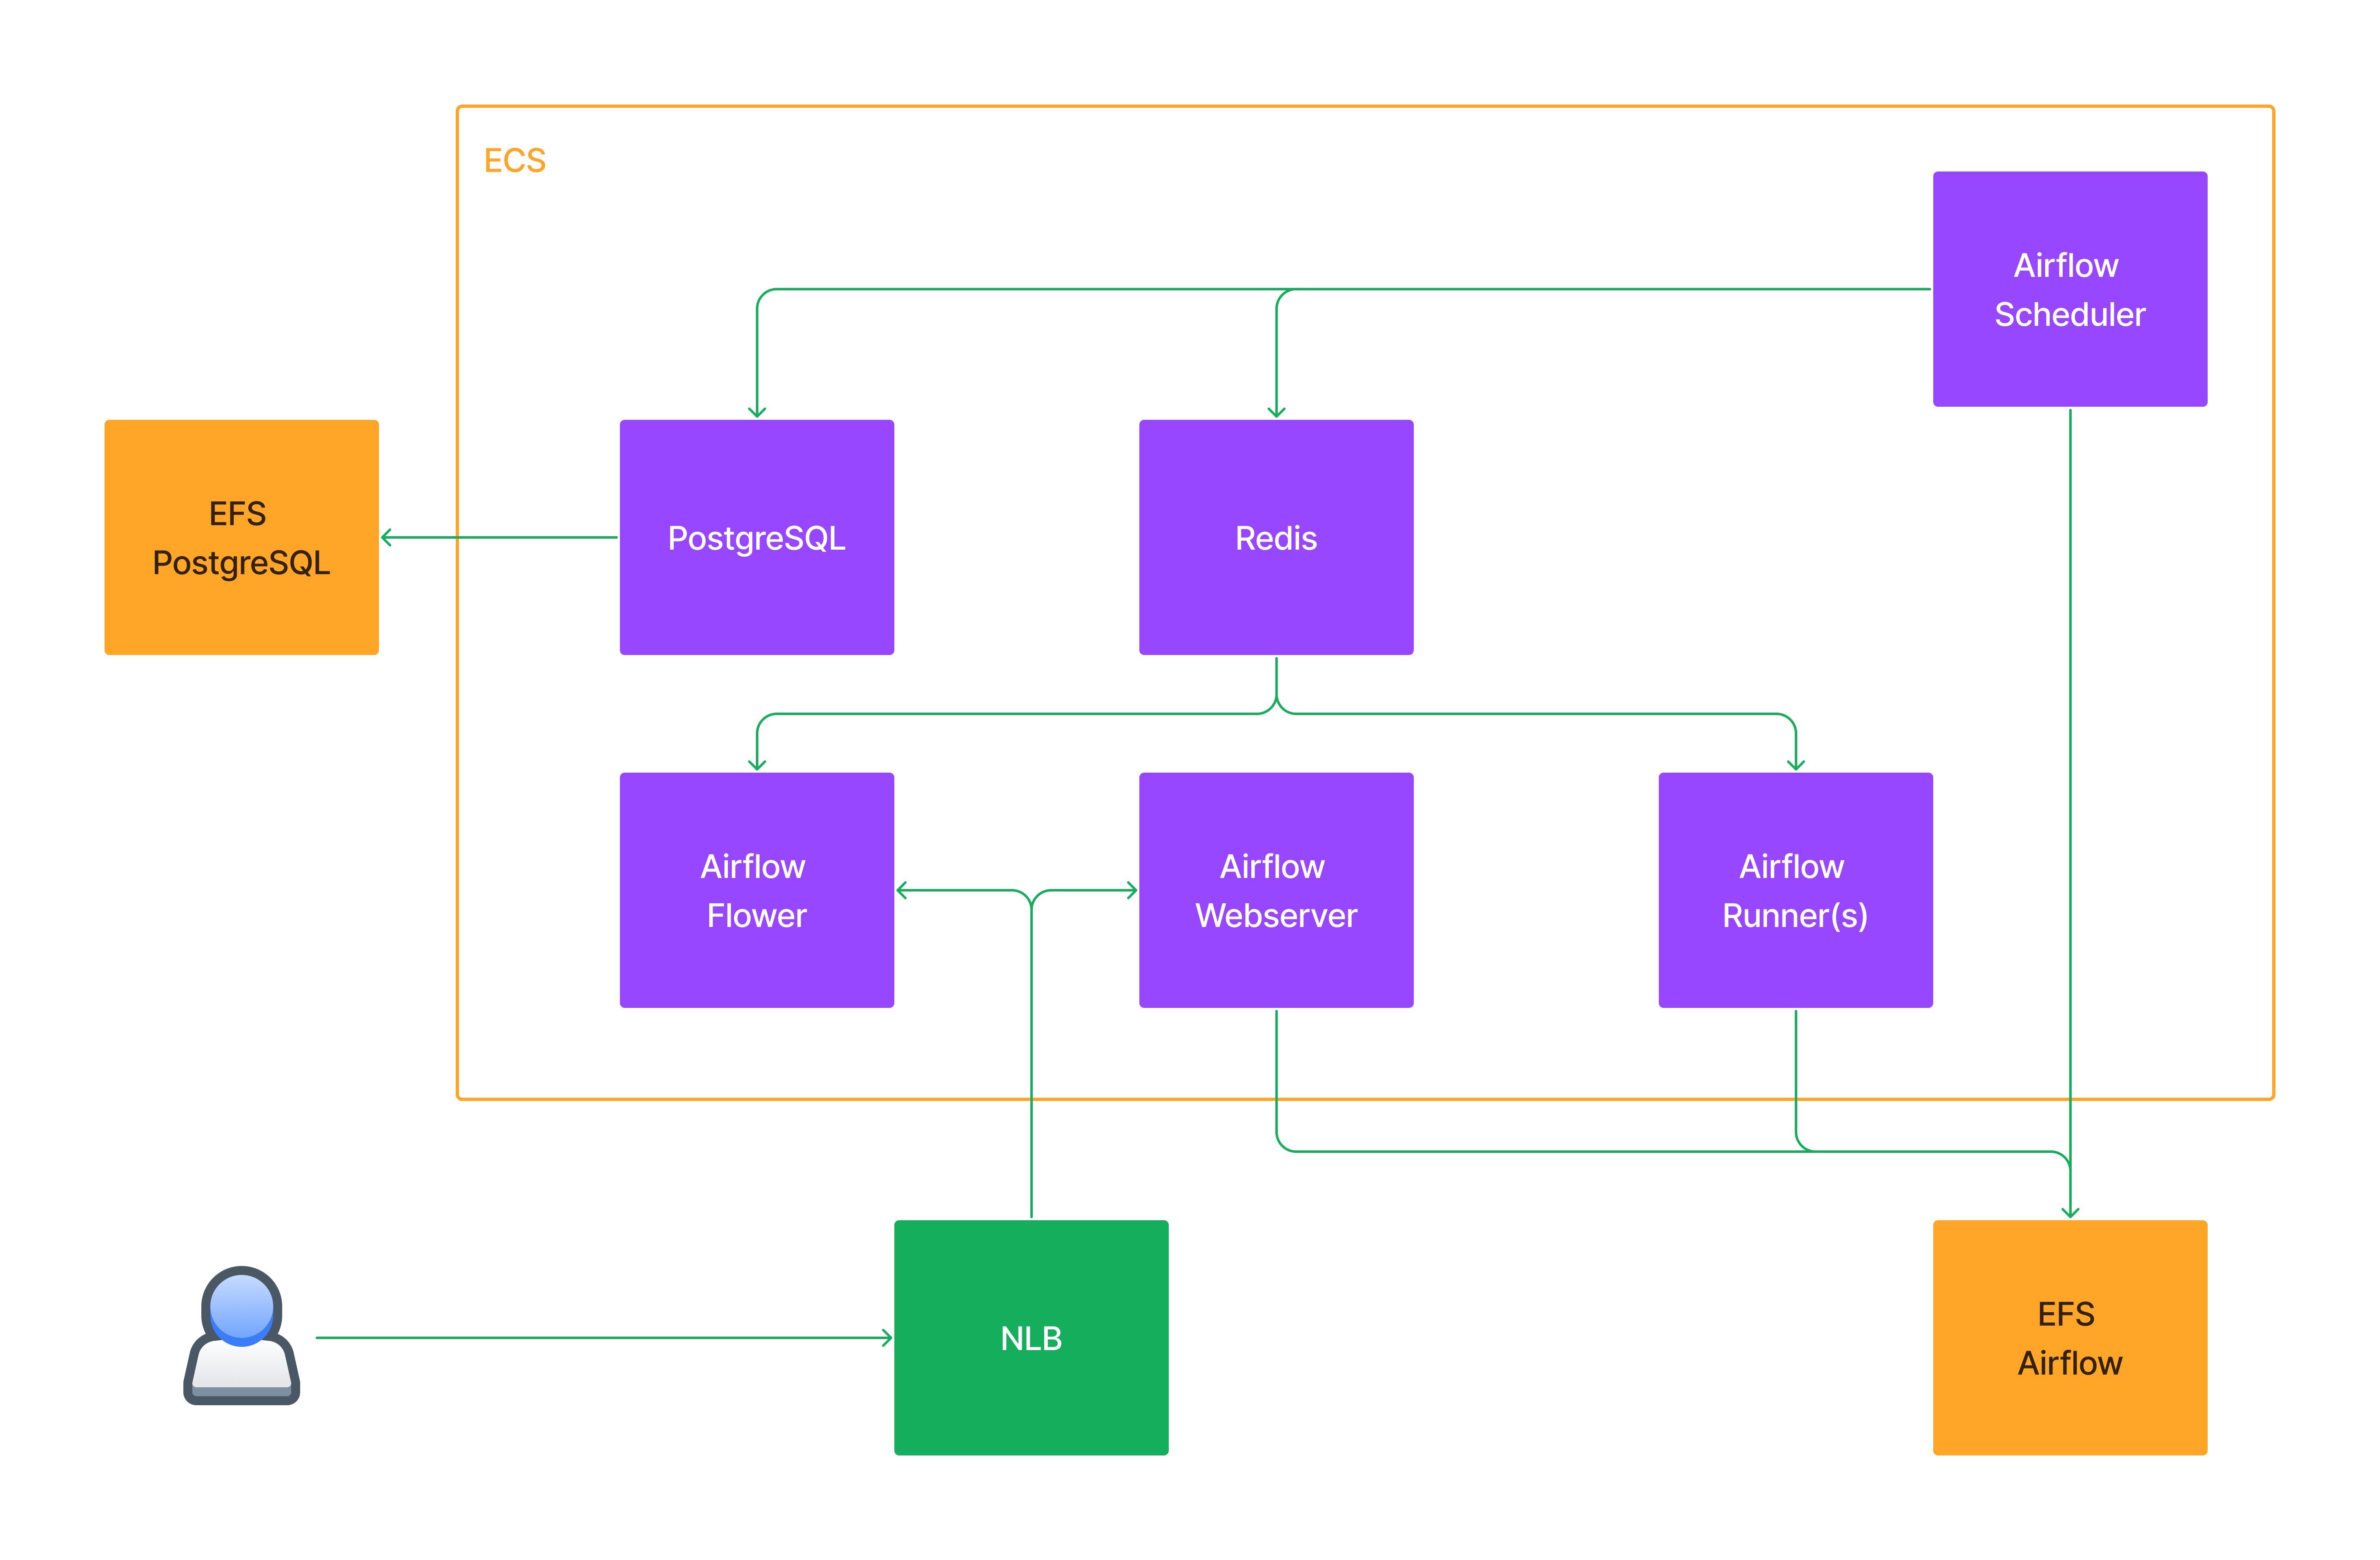
Deploy
Prerequisites
AWS CLI configured in your local using a set of credentials with:
Baseline required permissions.
Additional permissions:
ec2:DescribeVpcAttributeelasticfilesystem:DescribeFileSystemselasticfilesystem:CreateFileSystemelasticfilesystem:DeleteFileSystemelasticfilesystem:CreateAccessPointelasticfilesystem:DeleteAccessPointelasticfilesystem:CreateMountTargetelasticfilesystem:DeleteMountTargetelaticfilesystem:DescribeAccessPointselasticfilesystem:DescribeMountTargetselasticfilesystem:DescribeFileSystemPolicyelasticfilesystem:DescribeBackupPolicylogs:TagResourceiam:PutRolePolicyiam:DeleteRolePolicy
Security Group to be used in this deployment.
Create the Security Group.
aws ec2 create-security-group --group-name Airflow --description "Airflow traffic" --vpc-id "<your_vpc_id>"It creates a default egress rule to
0.0.0.0/0. Take note of the outputGroupId.{ "GroupId": "take note of this value" }Add internal rules to it.
Self traffic.
aws ec2 authorize-security-group-ingress --group-id "<airflow_SG_above_created_id>" --protocol all --source-group "<airflow_SG_above_created_id"Internal VPC traffic.
aws ec2 authorize-security-group-ingress --group-id "<airflow_SG_above_created_id>" --ip-permissions IpProtocol=-1,FromPort=-1,ToPort=-1,IpRanges="[{CidrIp=<your_vpc_cidr>,Description='Allow VPC internal traffic'}]"(optional) Add a rule for your public IP to access ports
5555(Flower service) and8080(Webserver service).aws ec2 authorize-security-group-ingress --group-id "<airflow_SG_above_created_id>" --ip-permissions IpProtocol=tcp,FromPort=5555,ToPort=5555,IpRanges="[{CidrIp=<your_public_CIDR>,Description='Allow Flower access'}]" IpProtocol=tcp,FromPort=8080,ToPort=8080,IpRanges="[{CidrIp=<your_public_CIDR>,Description='Allow Webserver access'}]"NOTE: there is currently no way (natively) of avoiding CloudFormation to create a
0.0.0.0/0rule in the SG for exposed ports in declared services. If you need to narrow down this access, you will have to delete the additional rules from the SG whiledocker composecreates the ECS services.
Steps
Clone the repo:
  $ git clone https://github.com/marianogg9/airflow-in-ecs-with-compose local_dir
  $ cd local_dir
Set required variables in
docker-compose.yaml:x-aws-vpc: "your VPC id" networks: back_tier: external: true name: "<airflow_SG_above_created_id>"(optional) If you want to use a custom password for the Webserver admin user (default user
airflow):This password will be created as an AWS Secrets Manager secret and its ARN will be passed as an environment variable with the following format:
  secrets:
    name: _AIRFLOW_WWW_USER_PASSWORD
    valueFrom: <secrets_manager_secret_arn>
Add a custom password in a local file:
echo 'your_custom_password' > ui_admin_passwordAdd a
secretsdefinition block indocker-compose.yaml:secrets: ui_admin_password: name: _AIRFLOW_WWW_USER_PASSWORD file: ./ui_admin_password.txtAdd a
secretssection in each service to mount to:secrets: - _AIRFLOW_WWW_USER_PASSWORDAdd the following required AWS Secrets Manager permissions to the IAM credentials you set
docker contextto use.secretsmanager:CreateSecret.secretsmanager:DeleteSecret.secretsmanager:GetSecretValue.secretsmanager:DescribeSecret.secretsmanager:TagResource.and please narrow down the above permissions to the secret ARN:
arn:aws:secretsmanager:<your_aws_region>:<your_aws_account_id>:secret:AIRFLOWWWWUSERPASSWORD*
Create a new
dockercontext, selecting a preferred method of obtaining IAM credentials (either via environment variables, a named local profile or a set ofkey:secret):docker context create ecs new-context-nameUse the newly created context:
docker context use new-context-name(optional) Review CloudFormation template to be applied, via:
docker compose convertDeploy:
docker compose up
Once the deployment starts, docker compose will show updates on screen. You can also follow up on the resources creation in the (AWS) CloudFormation console.
Web access
Get NLB name:
aws elbv2 describe-load-balancers | grep DNSName | awk '{print$2}' | sed -e 's|,||g'Or if you have
jqinstalled:aws elbv2 describe-load-balancers | jq .LoadBalancers[].DNSNameWebserver:
http://NLBDNSName:8080. Login withairflow:airfloworairflow:your_custom_created_password.Flower:
http://NLBDNSName:5555.
Running an example pipeline
I have included an example DAG (from Airflow's examples) in the repo. This DAG is also being fetched by airflow-scheduler task in startup time, so it will be available in Webserver UI.
As a prerequisite, create a PostgreSQL connection (to be then used by the DAG). In Webserver UI > Admin > Connections > Add +.
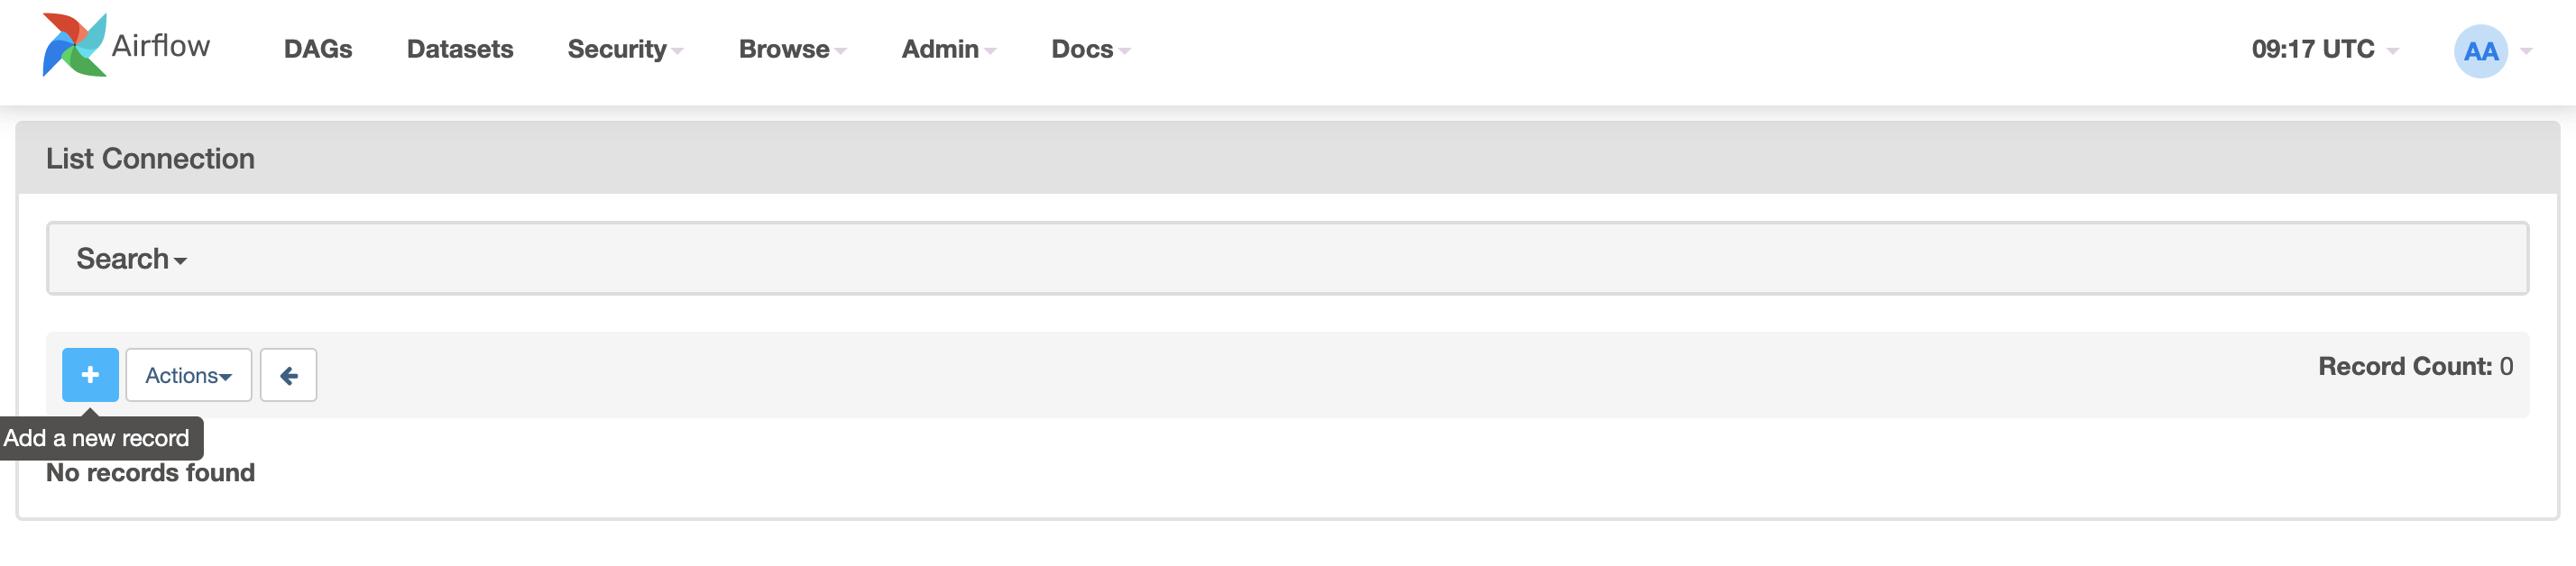
With the following parameters:
Connection Id:
tutorial_pg_conn.Connection Type:
postgres.Host:
postgres.Schema:
airflow.Login:
airflow.Password:
airflow.Port:
5432.
Then you can Test the connection, and if it passes, you can Save it.
Back to DAGs list, unpause the DAG process-employees and it will automatically run:
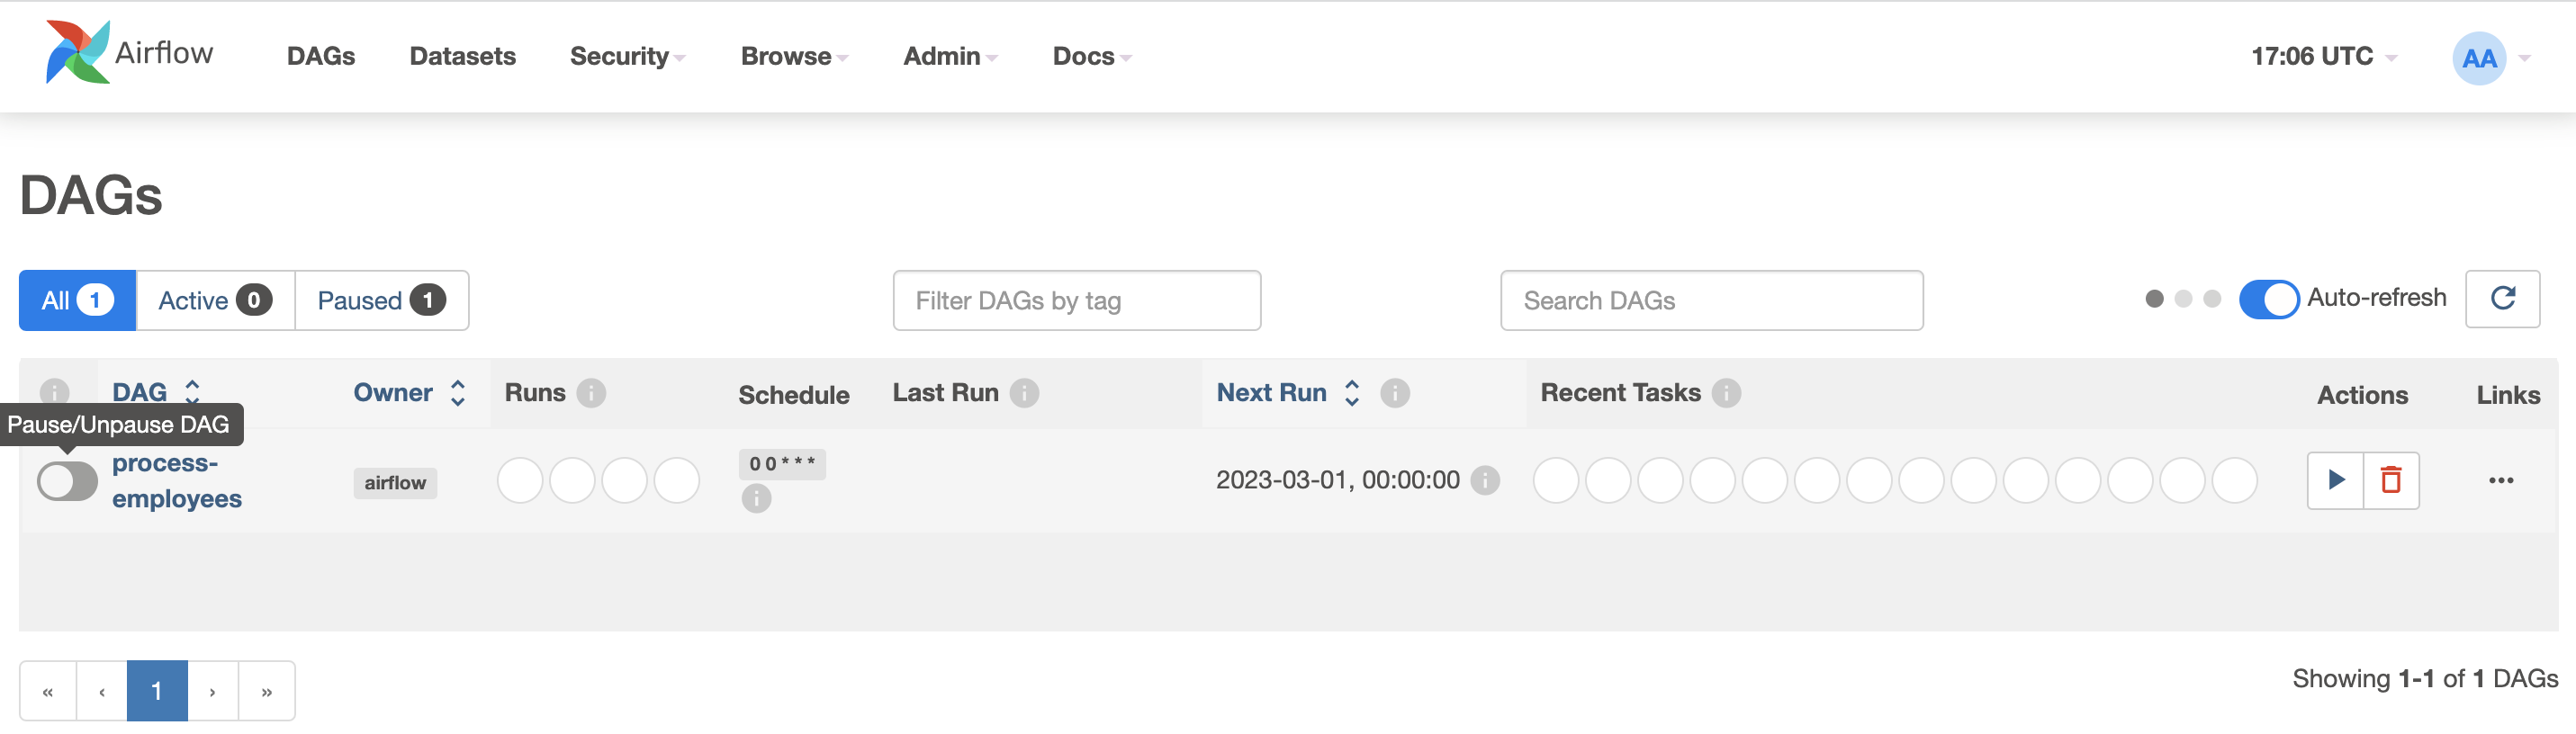
We can check the tasks being run (click in Last Run column link):
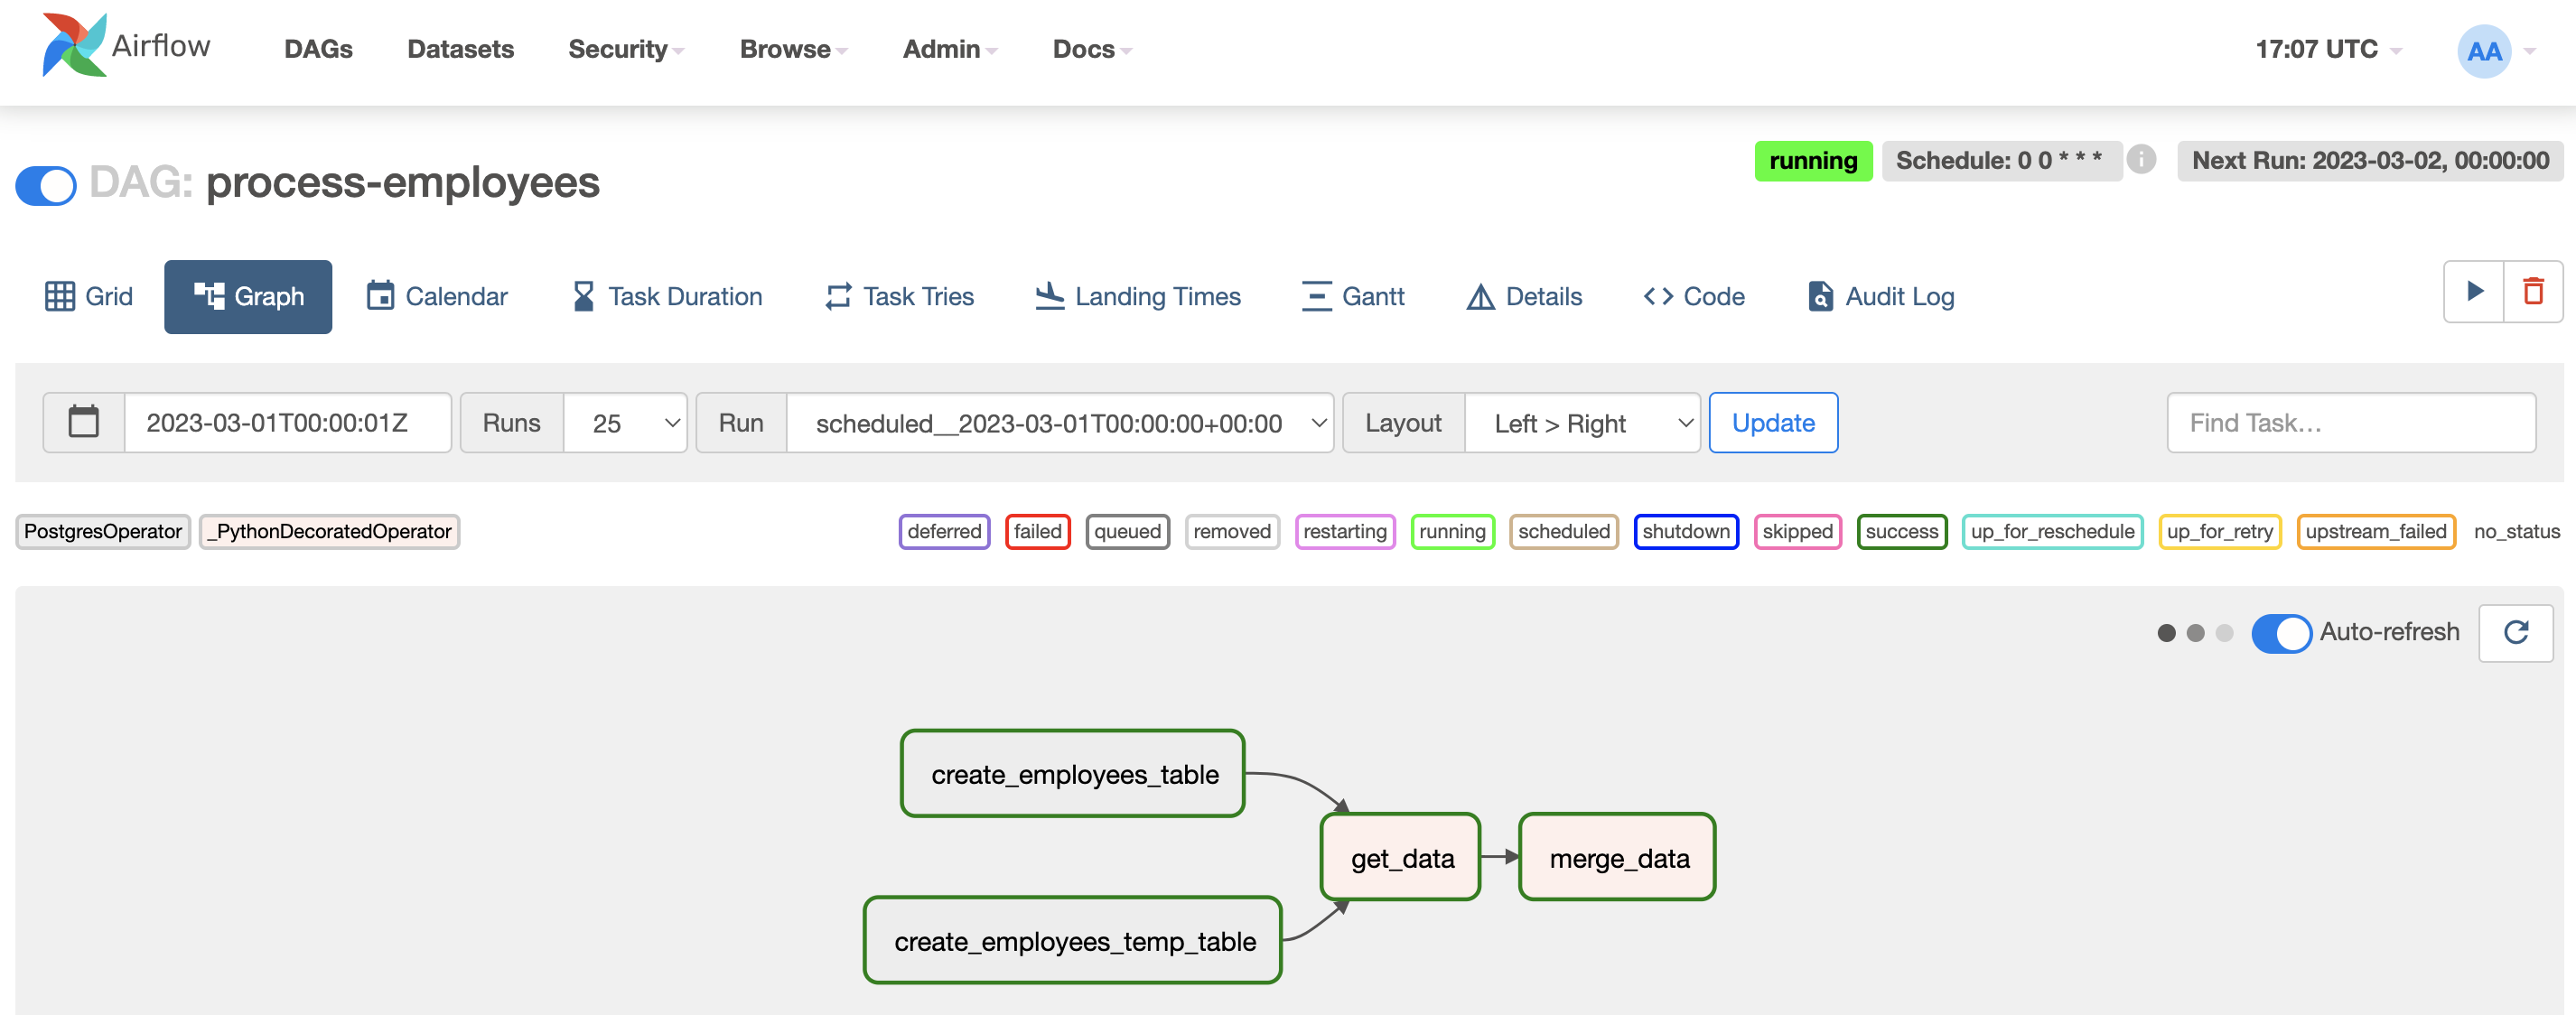
And have a look at Flower UI to followup on tasks vs workers:
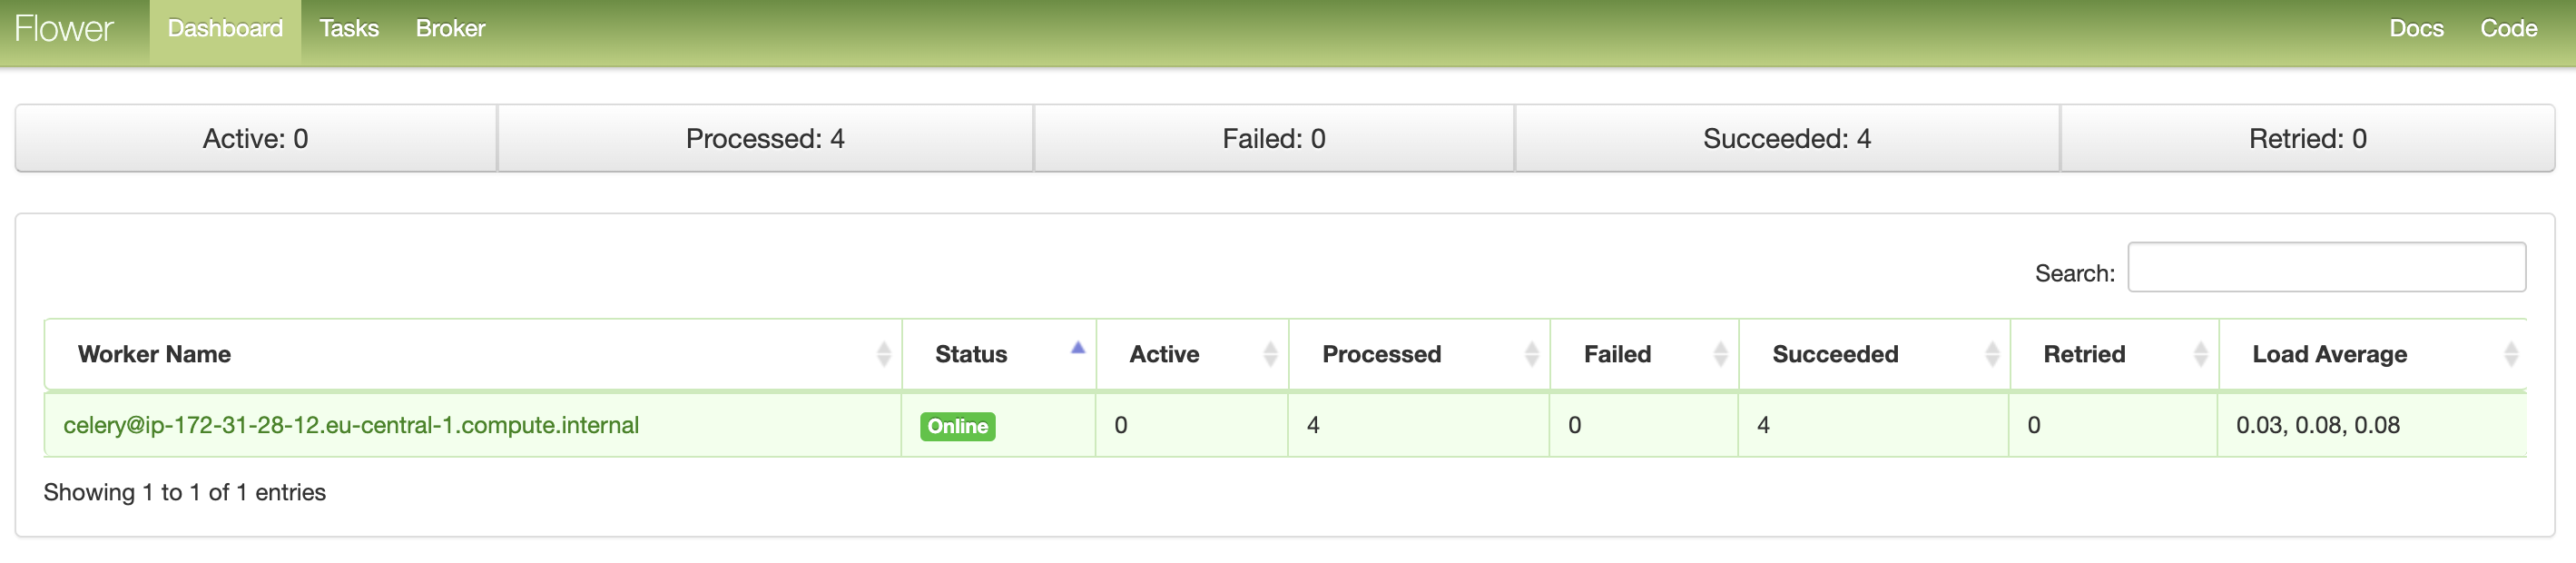
FIN! Now you can start adding/fetching DAGs from other sources as well, by modifying the fetch step in airflow-scheduler startup script and running docker compose up again to apply changes.
Clean up
Once you are done, you can delete all created resources with:
docker compose down
Important: remember to delete EFS volumes manually!!
docker composeintegration creates EFS volumes withretainpolicy, so that whenever a new deployment occurs, it can reuse them.Please see the official documentation for more info.
Also, remember to delete the SG and custom rules.
First the rules.
aws ec2 revoke-security-group-ingress --group-id "<airflow_SG_above_created_id>" --security-group-rule-ids <self_internal_SG_rule_above_created_id>aws ec2 revoke-security-group-ingress --group-id "<airflow_SG_above_created_id>" --ip-permissions IpProtocol=tcp,FromPort=5555,ToPort=5555,IpRanges="[{CidrIp=<your_public_CIDR>,Description='Allow Flower access'}]" IpProtocol=tcp,FromPort=8080,ToPort=8080,IpRanges="[{CidrIp=<your_public_CIDR>,Description='Allow Webserver access'}]"aws ec2 revoke-security-group-ingress --group-id "<airflow_SG_above_created_id>" --ip-permissions IpProtocol=-1,FromPort=-1,ToPort=-1,IpRanges="[{CidrIp=<your_vpc_cidr>,Description='Allow VPC internal traffic'}]"Then the SG.
aws ec2 delete-security-group --group-id "<airflow_SG_above_created_id>"
Gotchas & comments
docker composeoutputs are not very descriptive and only show one error at a time -> to understand AWS access errors, I used CloudTrail (Warning! heavy S3 usage).docker composesometimes fails silently usingecscontext. If you happen to face this, go back to default context withdocker context use default, try to debug the errors (now they will be shown on screen) and then go back toecscontextdocker context use new-context-name. See this issue for more info.servicediscovery:*permissions refer to CloudMap.Workers and Webserver
.25 vCPU | .5 GBis too few. Get it up to 2GB.Don't forget to delete EFS volumes manually!! This
docker composeECS integration will define Docker volumes withretainpolicy, so they will not be deleted automatically withdocker compose down.service.deploy.restart_policyis not supported even though the documentation says it is.You can configure POSIX permissions on the AWS EFS access points by adding
volumes.your-volume.driver_optsas described in volumes section. Also, trying to figure out how to mount the/dagsdirectory from AWS EFS correctly on the containers, setting rootdir and permissions is also allowed and supported.
Conclusion
This docker compose ECS integration allows rolling updates as well. Since it relies on AWS CloudFormation, you could get a working baseline version (e.g. PostgreSQL, Redis, Scheduler) and then add the Webserver or Worker services without having to start from scratch, or modify existing resources.
Simply updating your docker-compose.yaml locally and running docker compose up again will apply any new changes. This new run translates to a CloudFormation Stack update.
This integration gives a lot of flexibility and offers an abstraction layer if you don't want to deal with external dependencies. In doing so, it will assume and configure a lot of settings for you, which for some use cases will not be ideal. If this is your case, then it might make more sense to tweak the underlying CloudFormation template being generated.
Overall a great experience, with lots of unknowns and learnings. The documentation is not that extensive, it seems to be very practical as it won't go into deep details but gets the job done. Still some way to go, please check out this integration issues and enhancements.
References
This implementation repository.
Improvements
Add a reverse proxy https://airflow.apache.org/docs/apache-airflow/stable/howto/run-behind-proxy.html.
- HTTPS support.
Explore Fargate Spot.
Deploy in Kubernetes.
Thank you for stopping by! Do you know other ways to do this? Please let me know in the comments, I always like to learn how to do things differently.